
When I started livestreaming, and talking and teaching about livestreaming, there was one thing I really wasn’t prepared for: Just how scared people are of OBS Studio.
Yes, OBS Studio is an incredibly powerful piece of software. At first glance it can look like a confusing Black Box (quite literally if you leave it in the default dark mode).
But you don’t need to know all the settings and features to get started.
OBS Studio may or may not be right for you, but you shouldn’t be afraid of it.
And this week I want to issue you a challenge:
- Download and install OBS
- Create a single scene
- Use the Virtual Camera to share that scene with someone via Microsoft Teams, Google Meet, Zoom or literally anything that can take webcam input (if you’re nervous just try it with a sympathetic friend)
Download and install OBS Studio
OBS Studio is free and open source software for Windows, Mac and Linux.
- Go to OBSProject.com and select your platform (Windows, Mac, Linux).
- Wait for the file to download.
- Run the installer.
Create a single scene in OBS Studio
We’re going to:
- Add a video capture source (which is just a fancy way of saying “add your webcam”)
- Add graphics and text as desired
Add your webcam to your OBS Studio scene
To add your webcam:
- Go to Scene and in the Sources dock click the plus (+) sign
- Select Video Capture Device
- Give your new source a name (“Webcam” or “Logitech” or “Sony”, it actually doesn’t matter what you call this, as long as you recognise it in your list of sources). Click Ok.
- Select your device from the list and click Ok.
You drag the points of the corner of your video capture device source to increase or decrease the size of the camera footage proportionately. You can down the ALT key on your keyboard to crop the footage.
You can also do fun things like mask your camera or remove a green screen background.
Add graphics to your OBS Studio scene
To add graphics:
- In the Sources dock click the plus (+) sign
- Select Image
- Give your image a name and click OK.
- Use the Browse button to locate the image on your computer. Click OK.
OBS Studio supports many different image file types and transparency is supported where available.
Add text to your OBS Studio scene
To add text:
- In the Sources dock click the plus (+) sign
- Select Text (GDI+)
- Give your text a name and click OK.
- Add the text to the textbox provided. You can use the formatting options to adjust the font, colour and other options.
- Click OK
A note about layers: Sources at the top of your list will appear on top of other sources. If you want a background image to appear underneath your camera, for example, make sure the image is lower down the list than the camera. Similarly if you want the text on top, make sure it’s above other sources. (You can drag and drop sources in the list, or you can use the up and down buttons provided in the dock.)
Congratulations, you’ve built a simple scene in OBS Studio!
Use the Virtual Camera
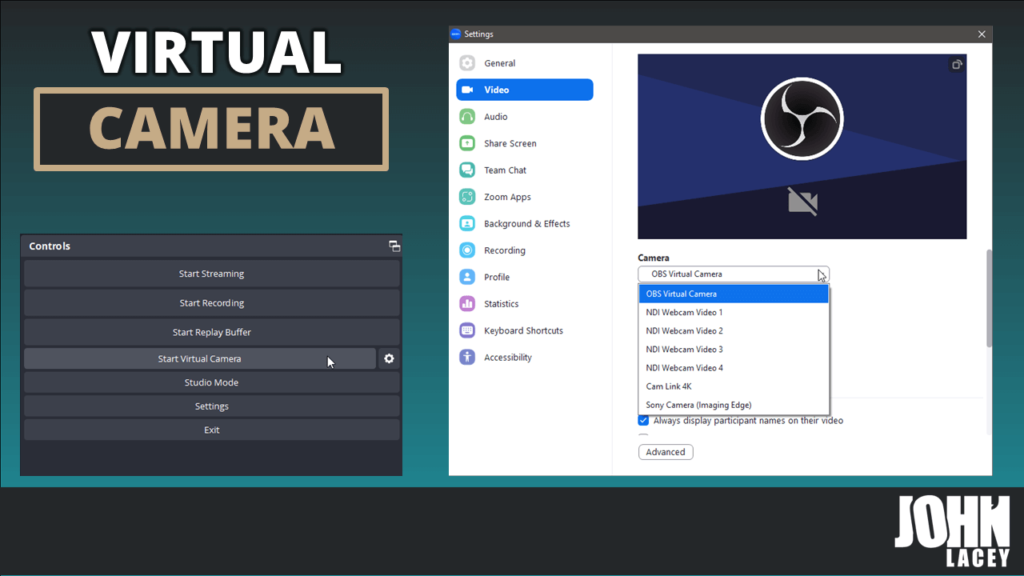
To use the scene you’ve created in OBS Studio in other programs you’ll need to Start the Virtual Camera.
In OBS Studio, click on Start Virtual Camera in the Controls dock.
In your communications software (Microsoft Teams, Google Meet, Zoom etc.) make sure you specify your camera as OBS Virtual Camera.
Congratulations, you’ve completed The OBS Studio Challenge!